Fiber optics clock
Sundials
While experimenting with fiber optics and all the ways light can be wired in analog fashion through an object (see fiber optics sculptures) I got interested in sundials and their geometry.
3D prints
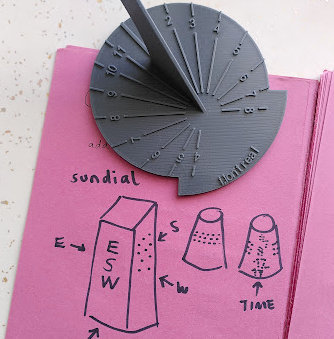
To get comfortable with the basics of sun geometries, I got a simple sundial 3dprint off Thingiverse and adjusted it to Montreal's altitude (45.50°). Because a sundial's 'gnomon' (the stick that throws the shade) is always meant to be in parallel to the earth's axis of rotation. (Sundials need to be vertical at the equator!)
Digital sundials!
Digging further into the Thingiverse sundial universe I also stumbled over digital sundials.
 Customizable sundial from Thingiverse
 I did a test print of the amazing Digital Sundial by Mojoptix that you can find on Thingiverse. The complicated angle geometries of the print through the shadow of a digital clock in 10-minute segments.
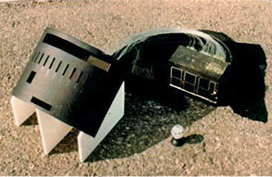
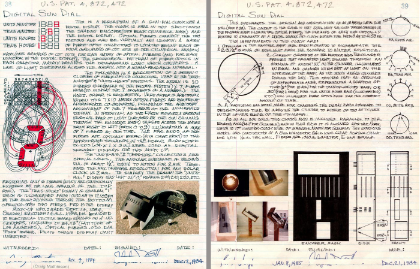 Digging deeper into alternative sundials I then found the incredible Solar Clock with Digital Time Display by Steve Hines, which uses fiber optics and precision engineering to activate a 7-segment clock with the sun. He patented it in 1988 and his patent paper drawings are great. (His website is also full of other fun geeky inventions).
Iterations, working my way through the geometries
The goal was to build a simple fiber optics sundial. An object that you can place on a window sill and that would indicate with lit-up fiber optics wires, what time it was. Super simple, one fiber representing one hour of the day.
Inspired by the customizable 3d-files you can get off thingivese, I decided to use OpenSCAD for creating the 3d files. (I love the light-weight nature of the program.)
Despite the simple task I set myself, it took me multiple iterations to get it right, as you can see below.
1: Simply input to output
I started out too quickly by simply orienting the fibers at 15 degree intervals, without restricting the light input at all.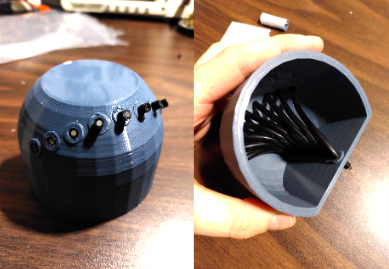 As you can see the sun input lights up nearly all output points, just fading off around the edges. Fail!
2: Limiting the input angle
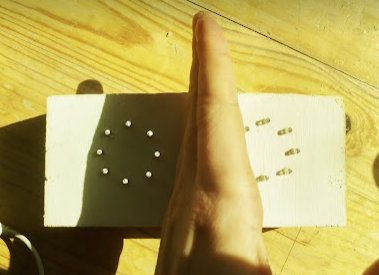
Obviously I needed to limit the sun's input angles. To avoid doing another full print, I only printed angle-limiting 'blinders' that I simply strapped onto the previous print.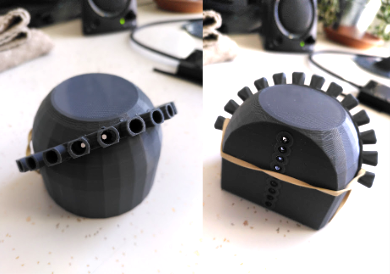 The segment of lit-up output dots is slightly smaller as you can see. Still a fail though.
3: Geometry, math!
At this point I dug into the geometry of the sun rays and realized that my input slots needed to be really tiny.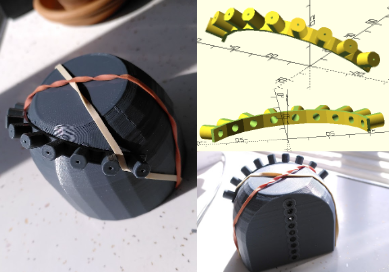 The output is much better! (Even though there's a fun out-of-order two-step effect happening due to imprecise mounting of the blinders!)
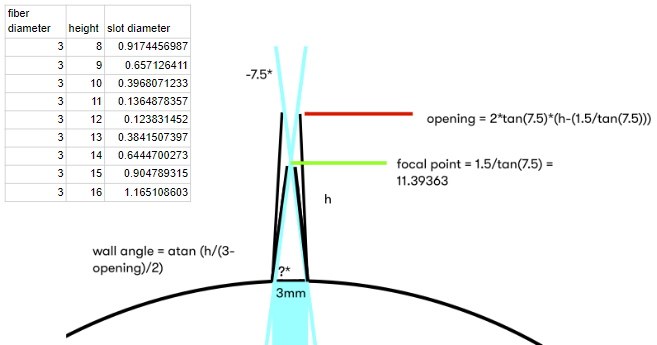
The angles
I haven't yet encountered a code problem (with visual output) that didn't require me to undust my knowledge of the Pythagorean theorem.
On the left this is me trying to work out how to control that only sun-rays within a specific 15-degree angle can fall onto a fiber end point (15 degrees = 1 hour). By designing a narrow shaft with a narrow opening, only those light rays that hit the fiber end point directly, would activate it. All sunrays entering at more inclined angles would be absorbed by the dark side walls of the shaft.
There is a sweet spot where the slot is the perfect focal point, but I didn't trust my 3d-printer with that precision, so I went with a slightly higher shaft length.
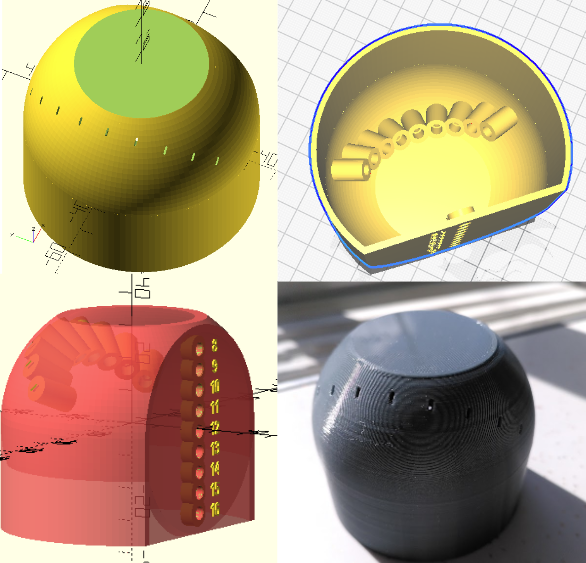
Final print
On the left you see the OpenSCAD renders of the final design. The top of the object is flat, to be able to 3d-print it upside down. The light shafts are extruded into the interior of the shape, with their first immediate segment functioning as pressure-fit holders of the fiber wires.
The slots are elongated to accommodate for the different sun angles during the seasons.
In the gif you see that the light dot does pretty distinct jumps from one hour-dot to the next. I am going to call that a